HTML
HTMLは単純にsectionで並べるだけです。
HTML
<section id="section1">
    <div class="inner">
        <h2>Section First</h2>
    </div>
</section>
<section id="section2">
    <div class="inner">
        <h2>Section Second</h2>
    </div>
</section>
<section id="section3">
    <div class="inner">
        <h2>Section Third</h2>
    </div>
</section>
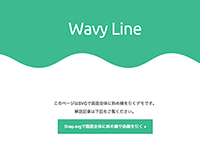
SVG
SVGは下記を外部ファイルとして保存しておきます。
今回は右上がりの右下がりの2パターン作成しました。
separate1.svg
<svg xmlns="http://www.w3.org/2000/svg" xmlns:xlink="http://www.w3.org/1999/xlink" viewBox="0 0 100 100" preserveAspectRatio="none">
  <path d="M0,100 v-100 L100,100 Z" fill="#cf6a80" />
</svg>
separate2.svg
<svg xmlns="http://www.w3.org/2000/svg" xmlns:xlink="http://www.w3.org/1999/xlink" viewBox="0 0 100 100" preserveAspectRatio="none">
	<path d="M0,100 h100 v-100 Z" fill="#61c06a" />
</svg>
CSS
SVGはsectionのafterにそれぞれ読み込みます。
afterの高さだけsectionのpadding-bottomも空けます。
CSS
section {
    color: #fff;
    padding-bottom: 150px;
}
#section1 {
    background-color: #5ba4cf;
}
#section2 {
    background-color: #cf6a80;
}
#section3 {
    background-color: #61c06a;
}
section:after {
    content: "";
    background-repeat: no-repeat;
    display: block;
    height: 150px;
    position: absolute;
    width: 100%;
}
#section1:after {
    background: url("svg/separate1.svg");
}
#section2:after {
    background: url("svg/separate2.svg");
}
#section3:after {
    background: url("svg/separate3.svg");
}