※Wordpress3.03を使用しております。
オリジナルのスタイルを適用する。
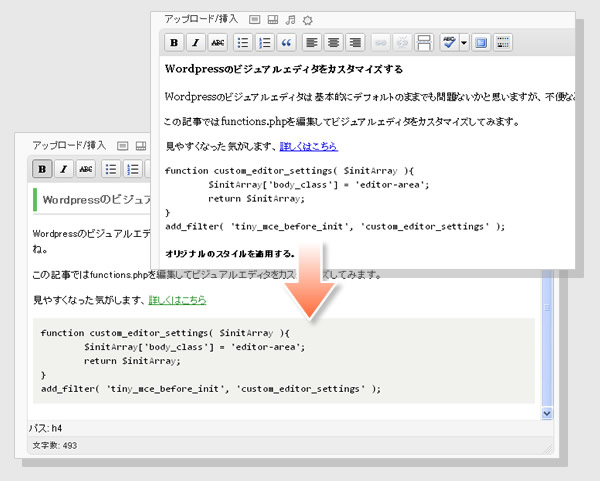
ビジュアルエディタはそのままだとテンプレートとスタイルが違うので、最終的なイメージがつかみにくいですよね。
テンプレートと同じスタイルを適用して、ある程度イメージの確認ができるようにしてみましょう。
現在使用しているテンプレートフォルダの「functions.php」に以下を記述します。なければ作成しましょう。
functions.php
add_editor_style('editor-style.css');
テンプレートフォルダ「editor-style.css」を作成すれば、このスタイルシートが読み込まれるようになります。
ただこれだけだと、たとえば「a」タグなどのスタイルが変更できません。
「functions.php」に以下を追加します。
functions.php
		function custom_editor_settings( $initArray ){
			$initArray['body_class'] = 'editor-area';
			return $initArray;
		}
		add_filter( 'tiny_mce_before_init', 'custom_editor_settings' );
これで「editor-area」というクラスを割り当てることができます。
なので「editor-style.css」は以下のように記述すればいけると思います。
editor-style.css
		/* フォントだけこのクラスで変更するようです。 */
		body.mceContentBody {
			font: 13px/1.6 "メイリオ", "MS Pゴシック", "Hiragino Kaku Gothic Pro", "ヒラギノ角ゴ Pro W3", Osaka, sans-serif;
		}
		.editor-area a {
			color: #339933;
			text-decoration: underline;
		}
		.editor-area h3 {
			padding: 3px 13px 6px;
			font-size: 116%;
			color: #666666;
			margin-bottom: 1em;
			border-bottom: 1px solid #CCCCCC;
		}
フォントの指定だけ「body.mceContentBody」というクラスで変更するようです。
フォーマットのh1,h2を削除する
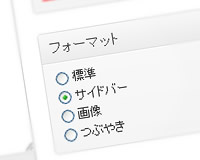
ビジュアルエディタのアドバンスドツールバーには「フォーマット」というセレクターがあり、ここからhxに該当する見出しや段落などを指定することができます。
これは便利なんですがだいたいブログはh1がブログタイトルで、h2が記事のタイトル名で、記事内で使用するのはh3くらいからなんじゃないかと思います。
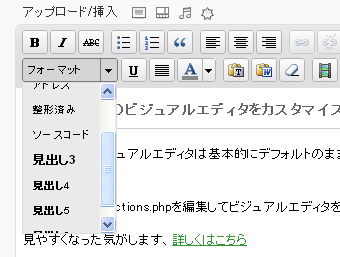
でも、htmlに詳しくない人はそういうことを知らずに「見出し1」とか選択してしまいそう。
ということで「h1」「h2」を選択できないようにしましょう。
functions.php
		function custom_editor_settings( $initArray ){
			// WordPress3くらい
			//$initArray['theme_advanced_blockformats'] = 'p,address,pre,code,h3,h4,h5,h6';
			// WordPress4から
			$initArray['block_formats'] = "見出し3=h3; 見出し4=h4; 見出し5=h5; 段落=p; グループ=div;";
			return $initArray;
		}
		add_filter( 'tiny_mce_before_init', 'custom_editor_settings' );
「$initArray[‘theme_advanced_blockformats’]」にh1、h2を除く形で指定します。
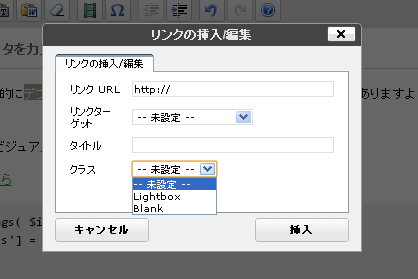
「リンクの挿入」ボタンにカスタムクラス設定する
「リンクの挿入」ではセレクターから簡単にクラスを適用することができます。
ここにLightBoxなどオリジナルのクラスを指定できるようになれば便利ですね。
functions.php
		function custom_editor_settings( $initArray ){
			$initArray['theme_advanced_styles'] = "Lightbox=lightbox;Blank=blank";
			return $initArray;
		}
		add_filter( 'tiny_mce_before_init', 'custom_editor_settings' );
$initArray[‘theme_advanced_styles’]に「Lightbox=lightbox」と記述します。
複数指定する場合は「;」で区切ってどんどん追加していきます。
ツールバーにボタンを追加する
ビジュアルエディタの初期に配置されているボタンは厳選されて配置されていますね。
このタグのボタンがほしいという場合追加することができます。
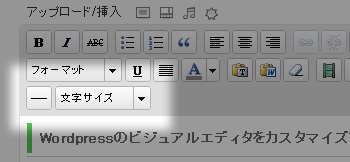
たとえばツールバーの3列目に「hr」と「fontsizeselect(フォントサイズ変更)」のボタンを追加する場合は次のようになります。
functions.php
		function custom_editor_settings( $initArray ){
			$initArray['theme_advanced_buttons3'] = 'hr,fontsizeselect';
			return $initArray;
		}
		add_filter( 'tiny_mce_before_init', 'custom_editor_settings' );
追加できるボタンは他にもいろいろありますので、下記のリファレンスを参考にしてください。
TinyMCE:Control reference
iframe削除させない
コードで「iframe」を書いても、ビジュアルエディタに切り替えると「iframe」は消えてしまいます。
xhtmlには非推奨だったりセキュリティ的にいろいろあるようですが、どうしても使用したい場合は下記のようにします。
functions.php
		function custom_editor_settings( $initArray ){
			$initArray['extended_valid_elements'] = "iframe[id|class|title|style|align|frameborder|height|longdesc|marginheight|marginwidth|name|scrolling|src|width]";
			return $initArray;
		}
		add_filter( 'tiny_mce_before_init', 'custom_editor_settings' );
[参考サイト]
Customize WordPress WYSIWYG Editor
Make the Visual Editor Actually WYSIWYG